Summary:
I was planning on posting set of instructions on “how to set up eclipse to create plug-ins” then “how to create a plug-in to add custom icon to business object” then “how to deploy that plug-in via OTW” thne I was going to show how to do it the quick and easy way. While I still am planning on providing this set of instructions, today I will show the “quick and dirty” way. You may want to do it the quick and easy way first in a test/development environment anyway. This way may not be the ideal way for production where you have to push this out to many users. So this quick and dirty way should only be used to where you only have just a few deployments and just want to test things out and see how every thing looks before going through the hassle of creating a plug-in and deploying to the masses. Although once you have the plug-in created and set up making changes or adding icons is a cinch.
Overview:
- Create Business object (If not OOTB)
- Create custom icon
- Create image directory and put in custom icon
- Create customer.properties files
Details:
Create Business object - I am not going to go through this here and I will be just creating a custom icon for the OOTB Item.
Create custom icon - I am not going through these steps either. I will assume you can come up with your own icon just be sure it is a .png or .jpg format.
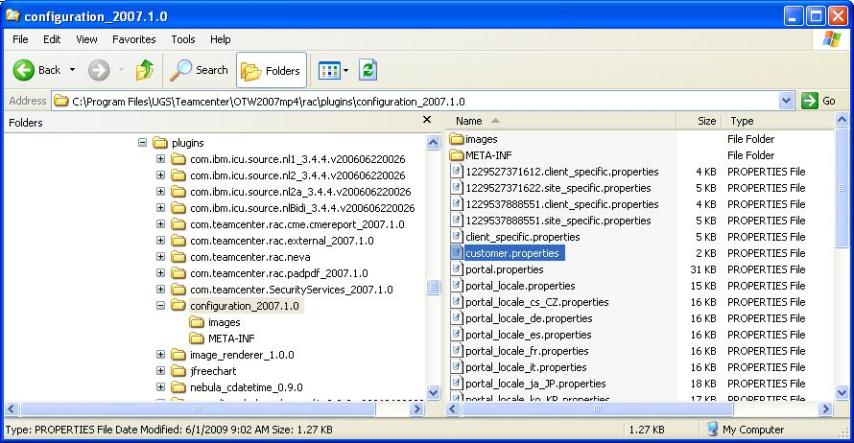
Create image directory and put in custom icon - Create a folder called images in $TCInstall\portal\plugins\configuration_2007.1.0\ then copy any icons on this folder.

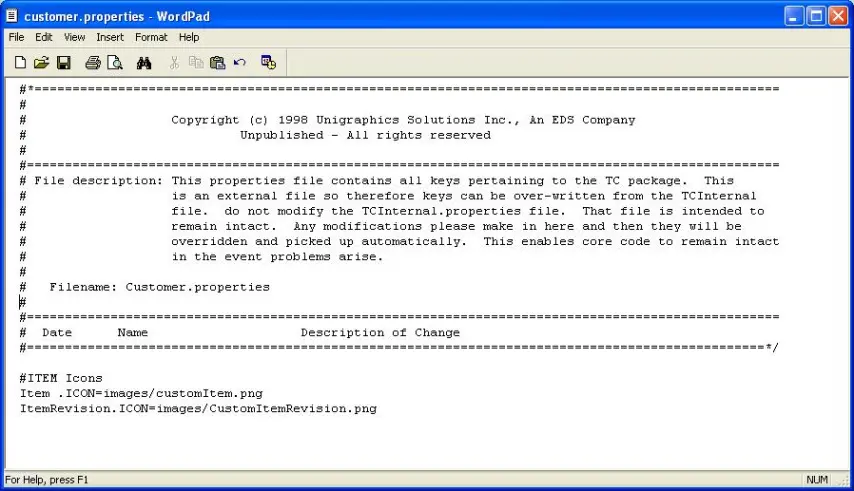
Create customer.properties files - Create a cutomer.properties text file and put this into $TCInstall\portal\plugins\configuration_2007.1.0\. See below for an example.

No comments:
Post a Comment