Showing posts with label Bloody Hackz. Show all posts

Friday, April 18, 2014

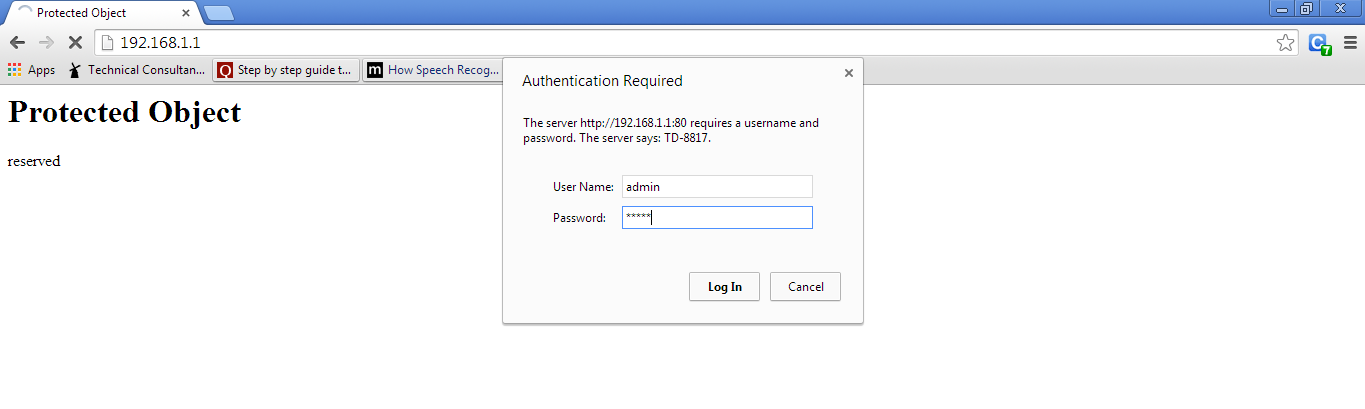
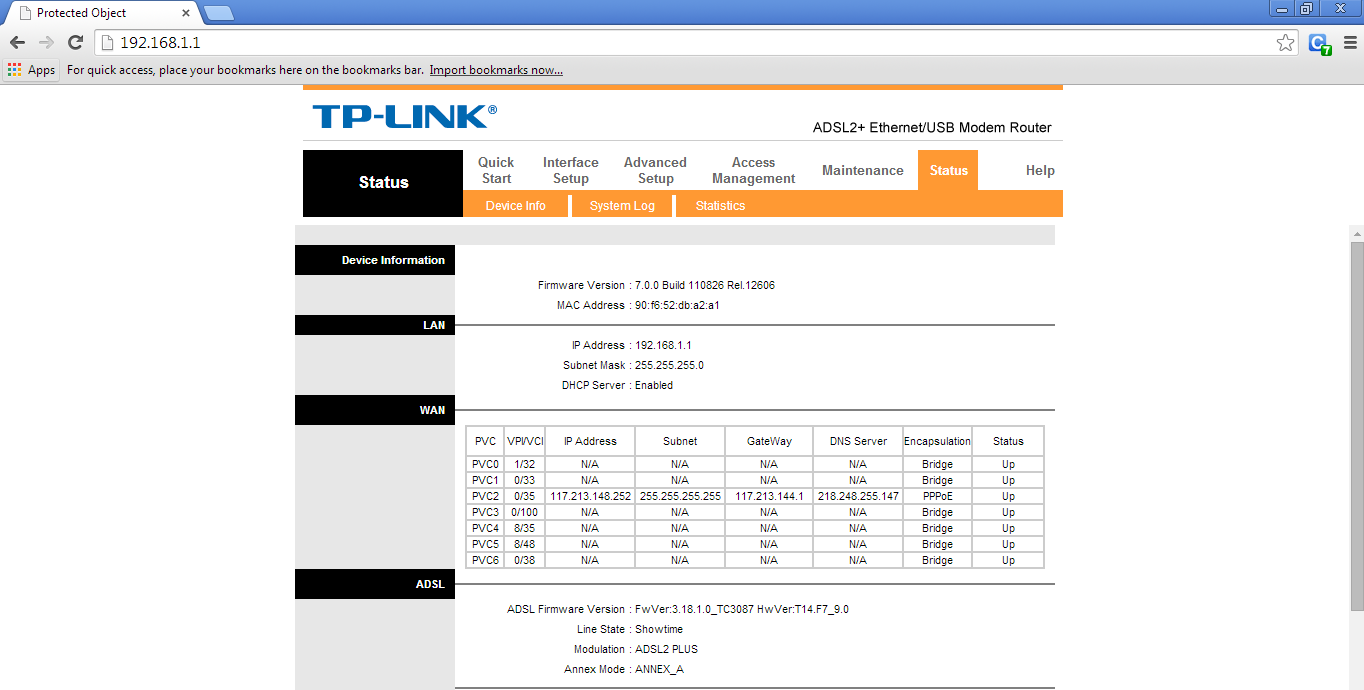
Connect to a URL using Basic Authentication : C/C++ using CURL


#include <stdio.h>
#include <stdlib.h>
#include <string.h>
#include <curl/curl.h>

struct string {
  char *ptr;
  size_t len;
};

void init_string(struct string *s) {
  s->len = 0;
  s->ptr = (char*)malloc(s->len+1);
  if (s->ptr == NULL) {
    fprintf(stderr, "malloc() failed\n");
    exit(EXIT_FAILURE);
  }
  s->ptr[0] = '\0';
}

size_t writefunc(void *ptr, size_t size, size_t nmemb, struct string *s)
{
  size_t new_len = s->len + size*nmemb;
  s->ptr = (char*)realloc(s->ptr, new_len+1);
  if (s->ptr == NULL) {
    fprintf(stderr, "realloc() failed\n");
    exit(EXIT_FAILURE);
  }
  memcpy(s->ptr+s->len, ptr, size*nmemb);
  s->ptr[new_len] = '\0';
  s->len = new_len;

  return size*nmemb;
}

int main(void)
{
  CURL *curl;
  CURLcode res;

  curl = curl_easy_init();
  if(curl) {

    struct string s;
const char *errmsg = NULL;
    init_string(&s);
curl_easy_setopt(curl, CURLOPT_URL, "http://192.168.1.1");
    curl_easy_setopt(curl, CURLOPT_USERPWD, "admin:admin");
    curl_easy_setopt(curl, CURLOPT_ERRORBUFFER, errmsg);
curl_easy_setopt(curl, CURLOPT_WRITEFUNCTION, writefunc);
    curl_easy_setopt(curl, CURLOPT_WRITEDATA, &s); 
    res = curl_easy_perform(curl);

/* Validate the Connection */
if(res != CURLE_OK)
    {
          printf( "curl_easy_perform() failed: %s\nError Message: %s\n", curl_easy_strerror( res ), errmsg );
    }

    //printf("%s\n", s.ptr);
    free(s.ptr);

    /* always cleanup */
    curl_easy_cleanup(curl);
  }
  return 0;
}

Thursday, April 10, 2014

Role Management Tool to install or configure Microsoft .NET Framework 3.5

While trying to install Visual Studio 2008 on a Windows 2008 R2 machine you may get the following error.
You must use the Role Management Tool to install or configure Microsoft .NET Framework 3.5.
This is because Windows 2008 R2 ships with the .NET 3.5.1 framework. You just need to enable the feature from Server Manager.
vs2k8win2k8r2sm
So before starting the Visual Studio 2008 Setup install the .NET Framework 3.5.1 Features from the Add Features Wizard in Server Manager.
After that when you run the Visual Studio 2008 Setup, the installer will detect that the 3.5 framework is already installed and skip to the next step.

Thursday, July 11, 2013

Teamcenter: Can a Business Object has Two Different TAG Values ?

If you think a business object can only have one tag value, then you have to look into this.

While creation, every business object will be assigned to a tag value in DB, in other words we call it as a UID value.

But at one state this Axiom can be proved wrong. 

At the time of check-out, a duplicate object will be created with the same data in the database. After check-in the duplicated object will be deleted.

So, we can say that at the time of check-out, a business object with same id or name or blah ..blah ...blah can have two different tag values although they look same virtually. :)

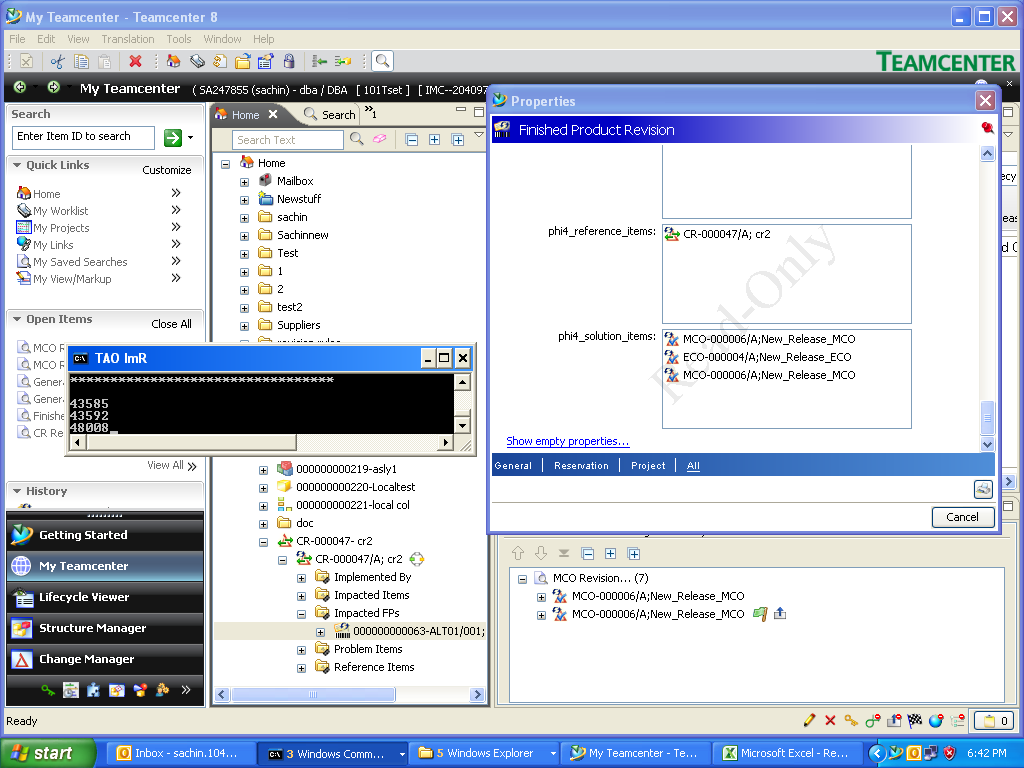
Check the below screenshot in which MCO-000006 object has two different tag values.


Tuesday, June 18, 2013

How to share Internet from your laptop to smartphone

Many smartphones or other devices do not support the same network configuration that is easily shared from laptop to laptop.
This guide can show you a free way to share your network connection with these devices without also needing to install any third-party software on Windows Vista or 7 (though it's possible on XP too). Keep in mind that this works best when your laptop is connected via a cable. Ultimately, this method is ideal for sharing the Internet connection in a hotel room (many rooms have only one ethernet cable) from your laptop to other devices.
All you'll need in advance, besides a working network connection, is an up-to-date version of the Java Runtime Environment installed. You can check whether you have JRE, or even get the latest version here
(Credit: Screenshot by Nicole Cozma)
Step 1: Open your browser of choice and navigate to www.virtualaccesspoint.com. Note that this page will need to remain open as long as you want to share your connection.
(Credit: Screenshot by Nicole Cozma)
Step 2: Once the page is loaded, a small window will open asking for permission to run an app. This is normal, and you'll need to grant it permission to run.
(Credit: Screenshot by Nicole Cozma)
Step 3: Enter the name for your access point, as well as the desired security key. Click on Turn On Soft AP to create your access point.
(Credit: Screenshot by Nicole Cozma)
Step 4: Right-click on the network icon in your System Tray. Click Open Network and Sharing Center.
(Credit: Screenshot by Nicole Cozma)
Step 5: A new network will appear in your list of active networks with the name you chose in Step 3. Click on the link next to Connections.
(Credit: Screenshot by Nicole Cozma)
Step 6: Click Properties in the window that appears.
(Credit: Screenshot by Nicole Cozma)
Step 7: Click on the Sharing tab and check the box labeled Allow other network users to connect through this computer's Internet connection. Select Local Area Connection from the drop down box and click OK.
You should be able to connect to this new access point with just about any device that supports wireless. Once you're done with the connection, simply press the Turn Off Soft AP button on the VirtualAccessPoint page.

Wednesday, June 12, 2013

Easily Share Files Between your Mobile Phones and Computers


Your digital data – like files, photos, documents, music, ebooks and videos – is spread across a range of devices including your mobile phone, the tablet and your computer(s).
How do you easily transfer a file from the Android phone to your iPad? Or how do you copy-paste that long snippet of text from the computer to your iPhone? The following guide discusses apps, both web-based and mobile apps, that will help you exchanges files and everything else between your desktop computer and mobile devices easily and quickly.
digital
The popular and most obvious solution for sharing files across devices is email. Send a file to yourself from one device and then download that email attachment on the other device. Alternatively, you may use file storage services like Dropbox, Google Drive or SkyDrive (readcomparison) to transfer files from one device to another via the cloud.
Then there are web-based apps to help you move files between your computers and phones without any software. There’s ge.tt where you can upload files from the browser and download them on any other device. JustBeamIt is another web-based file transfer service where there are no limits as the file content is streamed directly from the source to the destination and not stored on third-party servers.
Google Keep is my favorite service for transferring text snippets from one device to another. You can write, or paste, text inside Keep and it instantly becomes available on all the other devices. Keep is web-based but they also have an Android app. I use Google Keep for transferring URLs from the desktop to mobile browser and also passwords that are too long and complex for typing on the mobile keyboard. Hopper and MoPad are other good web-based alternatives that can again be used for sending links and text snippets across devices.
If you are an Android user, AirDroid is probably the only app you’ll ever need for moving files in and out of your phone. Once you launch AirDroid, you can easily download (and upload) files and folders from the phone to your computer wirelessly via the web browser. The only restriction is that your phone and computer should be part of the same Wi-Fi network.
Mac OS users can consider installing Droid NAS, an app that will make your Android phone /tablet appear in Finder and you can then easily browse or transfer files over Wi-Fi.
SuperBeam is another useful app for transferring files between Android devices. Select one or more files inside any file manager app and choose SuperBeam from the Android sharing menu. It will generate a QR code that you can scan with SuperBeam on your other device and the file transfer will happen automatically. If the two Android devices are not connected to the same Wi-Fi network, SuperBeam will transfer files using Wi-Fi Direct mode.
Unlike Android, Apple does not provide access to the iOS file system except for the media gallery. You can use the excellent Documents app to transfer documents, photos and other files from the computer to your iPad and iPhone over the Wi-Fi network. The Documents app can be mounted as a network drive on your computer and files can be moved across iOS devices via drag-n-drop. The app also has a built-in browser to help you download and store web files including file types that aren’t supported by the default Safari browser.
iOS doesn’t support Bluetooth based file transfer so if you are to transfer photos or videos from the camera roll of your iPhone to an iPad, Dropbox is probably a good choice. For single files, web apps like ge.tt and DropCanvas.com are perfect for the job.
Mobile apps like Bump and Hoccer that let you exchange files between Android and iOS devices, or between your computer and your mobile device, with simple gestures.
In the case of Bump, select a file on your mobile phone, tap the space bar of your computer with the phone and the file will instantly become available in the computer’s browser. For Hoccer, you can place your two phones side by side and drag a picture from one phone to another. If you have never tried these apps before, they’ll simply amaze you.

Easily Find the Serial Number of your Computer

You’ve got a problem with your computer, you call their technical support team and the person on the other side requires the machine’s serial number (also known as the Service Tag) before he can even log your request.
dell service tagIf you using a laptop computer, you can easily find the service tag by turning the machine upside but for desktops, especially the older models, the sticker that holds the service tag is often placed at a more harder-to-reach location.
There’s a alternate way to find the computer’s serial number without you having to slide beneath the table.
Open the command prompt (Start – > CMD) and type the following command:
wmic bios get serialnumber
Another command that will also print the model number (or make) of your computer is:
wmic csproduct get name, identifyingnumber 
The system model number can also be found using the System Information program available under All Programs – > Accessories – > System Tools.
The above commands should work on Windows 7, XP and Windows XP Pro machine as wmic.exe didn’t ship with the previous editions of Windows.

Wednesday, April 10, 2013

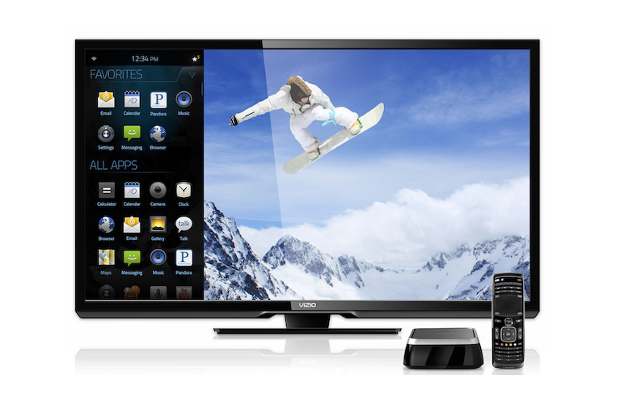
Convert your TV into an Android tablet

Today,I came across an exciting issue that converts your old TV into an Android Tablet.The Heading itself looks enormous.
You Should not have to touch any hardware.It's really very EASY.
Let go it through:-

Convert your TV into an Android tablet

There are a lot of options that convert your TV into an Android device without the need to change anything inside the TV. Here are the options available in India.

We have had a wave of low cost tablet PCs and Android smartphones, now it seems that the time for micro PCs based on Android is coming up. These devices use a TV screen or computer monitor as display. The pricing currently starts at $48 (Rs 2,500) but unfortunately the prices in India are still very high.

We hope that Indian brands will soon bring these mini PCs to India at an affordable price, just the way they did with smartphones and tablets. In the meanwhile you can have a look at some of the devices that you can get shipped through eBay (apart from the three devices sold in India officially). You can also ask your friends abroad to help you get these.

Razor Bee (Rs 2,999)
The Razor Bee smartTV upgrader is a box shaped device that is based on Android 2.2, and comes with an ARM Cortex A8 processor and 256 MB RAM. This product is being sold by a Hyderabad based manufacturer.
It comes with a touchpad based remote, allows web browsing, Youtube video playback, quick and TV-friendly search, and plays media from USB or SD cards.
Convert your TV into an Android tablet
It comes with DLNA player that allows DLNA enabled mobile phones, tablets or PCs to push music, photo and videos to the TV.
On the down side the box doesn't have WiFi connectivity, though you can attach a WiFi router. It comes with two USB ports that can be used to attach a webcam, keyboard etc. However, it doesn't support 3G dongles. The connectivity is through an RJ45 jack for internet. It also has a 3.5 mm jack for a mic and headphone.
The box is priced at Rs 2,999 and some of the sites are offering basic mobile phones free from Micromax and Olive. Only three months warranty is offered for this box.
Google TV Cloud Stick (Rs 5,045)
This is a very neat pen drive shaped device that you can plug into the TV's HDMI port (in case your TV doesn't have an HDMI port, this is not for you); and here you go, your TV starts running Android 4.0 with full access to Google Play store. You can even stream video from your PC over WiFi.
The dongle gets 4 GB internal storage. Unfortunately there is no external storage option. For attaching a keyboard or mouse you have a full USB port. There is no battery in the device and therefore you will have to keep the charger attached all the time, but then that's alright since it's not a mobile device anyway.
Hacker's Act.
Convert your TV into an Android tablet
This cloud stick supports full HD playback and almost all the popular file types. It also supports cloud storage like Dropbox and streaming of media.
In terms of hardware you get a 1 GHz processor, 512 MB RAM, and 4 GB memory. There is no keyboard or mouse in the box. Though it is a very useful device, unfortunately it is costly due to it being imported by the seller. Otherwise, it is a $48 (Rs 2,500) device only.
Portronics Limebox smart (Rs 6,999)
This smartTv box comes with full one year warranty and is based on Android 2.3. It has a 1.2 GHz processor, 512 MB RAM, 4 GB internal memory and up to 32 GB through SD card. You also get WiFi support and an RJ45 jack for internet connectivity.
In terms of ports you get two USB, 1 HDMI, and three audio out jacks (you can therefore connect 5.1 speaker systems). You can also attach a USB pen drive, or hard disk for storage.
Convert your TV into an Android tablet
Because it's meant to be used with your TV or any other large monitor, the UI has been greatly modified from the stock Android interface. There's no lock screen, menu screen, multiple home screens or any of that - just one simple screen with folders. There's media, internet TV, browser, game, apps and settings on the front screen with each of them housing their respective widgets.
Limebox comes in white and lime colour combinations and is a good looking piece of hardware. It is a good buy considering that it comes with full warranty. However, we think it is overpriced at Rs 7,000, given that similarly specced tablets are priced at the same level and additionally get battery and a screen, both of which are among the costliest components of the tablet. But if you really want it to be attached to the TV all the time, it is better than a laptop attached using an HDMI cable provided that you get a user interface designed for TVs, and also many ports which are not there in any tablet (like the RJ45 port which allows you to connect wired broadband).
Internet TV Box (Rs 4,490)
This internet TV box being sold on eBay comes with a 1.2 GHz processor coupled with 3D GPU and 512 MB DDRIII RAM. It is based on Android 2.3.
You get 4 GB internal storage, WiFi support, infrared remote (though you will need a keyboard for typing,) and also Bluetooth (which can be used for a wireless keyboard and mouse).
Convert your TV into an Android tablet
In terms of connection you get a USB port (which you can use for storage), an SD card slot, and stereo audio output jacks.
The box supports all major audio and video file types, and also Adobe Flash. The internet TV box comes with 1 year seller warranty and, at Rs 4,490, is the cheapest after Razor Bee.
Amkette EvoTV (Rs 9,999)
This is the costliest smart TV box here and is made by Amkette, which was market leader of floppy drives (now floppy drives don't exist). The box is based on a modified version of Android 2.3 OS and comes with an Arm Cortex A9 processor coupled with Mali 400 GPU
Convert your TV into an Android tablet
It supports a USB keyboard, mouse, webcam and 3G dongle, and comes with an Evo Touch (wireless) remote, which works in the range of 10 meters and doubles up as a mouse so that moving the remote moves the cursor. There is also an Evo Touch function for on-screen control that offers motion sensors for games. The device has an inbuilt microphone for video conferencing and voice commands, and the remote works using universal remote functions for standard TV controls. There is also a 700 mAh battery for power backup.
Convert your TV into an Android tablet
In terms of features the box is great but then Rs 9,999 doesn't really justify the purpose that it serves. The box comes with a 1 year warranty.
Friday, April 5, 2013

INTERNET DOWNLOAD MANAGER (IDM) 6.12.23 SERIAL KEY


Here are some serial Keys for the Latest version if Internet Download Manager out there~


Serial Keys: 
D91GM-T5X1J-DW7YG-1GHIS
I23LZ-H5C2I-QYWRT-RZ2BO
8XJTJ-ZTWES-CIQNV-9ZR2C
PAQ34-MHDIA-1DZUU-H4DB8
4CSYW-3ZMWW-PRRLK-WMRAB
DDLFR-JKN5K-B4DE3-H2WYO
9RVII-F3W58-6FAYV-WPTFD
M7CQ2-VARGX-QFYGZ-URKG0
POOUS-S8V4C-1RXUH-HG6NQ
7JPTJ-4XLY3-HM4LK-9UP4Q
OJNGE-77NS5-MW5FC-MFB7A
HSIWU-KRQQQ-Y870K-YI6QQ
HF0I6-AYL1O-BHDI7-DG9LW
LC3OG-66OU3-38BTX-SX20M
52OGI-AKRTG-MT6YU-YZ7OU
WNJ39-J1JN0-JKNVS-BZSCB
7WPV5-NHHF3-A2P39-LRJ74
OV4O3-1ASY1-8CDWI-9UGX4
O00C4-MYLXJ-LYUDP-QFGD5
I80CQ-RUG1G-LEP9V-O7UN0
OUC2X-F1F8A-8LO76-ETQCK
SN1OJ-P3ZGF-RU4XN-S61TZ
4P6BG-WGN41-C5CQQ-QXIO8
76JVD-ISRBG-KZB4U-LGL9D
PBPXJ-BC1EH-FKO7F-VUXJ2
30P7F-IG6PZ-CSZ3L-FRL7N
4B5XT-BOSBK-94O5F-669DJ

LIST OF DEFAULT BIOS (BACKDOOR) PASSWORDS.


If You have forgotten the real password of the BIOS then it is very difficult to get it back. One alternative is to guess the Backdoor Password which will give you access to the machine.

Award BIOS backdoor passwords: 

ALFAROME
BIOSTAR        
KDD
ZAAADA 
ALLy
CONCAT
Lkwpeter
ZBAAACA 
aLLy
CONDO         
LKWPETER      
ZJAAADC
aLLY          
Condo       
PINT
01322222     
ALLY        
d8on
pint           
589589      
aPAf
djonet       
SER        
589721
award        
HLT          
SKY_FOX
595595       
AWARD_SW 
J64
SYXZ     
598598    
AWARD?SW
J256        
syxz        
AWARD SW
J262      
shift + syxz  
AWARD PW
j332          
TTPTHA    
AWKWARD
j322        
awkward

AMI BIOS Backdoor Passwords:

AMI        
BIOS      

PASSWORD

HEWITT RAND

AMI?SW    
AMI_SW
LKWPETER   
CONDO


Phoenix BIOS Backdoor Passwords: 

phoenix     

PHOENIX  

CMOS     

BIOS

Misc. Common Passwords

ALFAROME    
BIOSTAR   

biostar

biosstar    

CMOS   
cmos
LKWPETER  
lkwpeter
setup
SETUP        
Syxz      
Wodj


Other BIOS Passwords by Manufacturer

       Sl.  Manufacturer                                 Password

  1. VOBIS & IBM                                     merlin
  2. Dell                                                     Dell
  3. Biostar                                               Biostar
  4. Compaq                                            Compaq
  5. Enox                                                   xo11nE
  6. Epox                                                   central
  7. Freetech                                            Posterie
  8. IWill                                                    iwill
  9. Jetway                                               spooml
  10. Packard Bell                                    bell9
  11. QDI                                                    QDI
  12. Siemens                                          SKY_FOX
  13. TMC                                                  BIGO
  14. Toshiba                                           Toshiba
  15. Toshiba                                           BIOS
  16. Biostar                                             Q54arwms
  17. Compaq                                         Compaq
  18. Daewoo                                          Daewuu
  19. Daytek                                             Daytec
  20. Enox                                                 xo11nE
  21. Epox                                                central
  22. Freetech                                         Posterie

Thursday, March 14, 2013

Awesome Open Source Time Tracking System

Hello Folks,

I was searching for an open source time tracking system and I found this "KIMAI". It's GUI is easy to understand and to customize as well.

Kimai

Kimai is based on PHP5/MySQL5 technology. If you don’t have a web server installed on your machine you can use XAMPP (Windows and Mac). XAMPP comes with everything you need for Kimai.

Kimai is a free open source timetracker. It tracks work time and prints out a summary of your activities on demand. Yearly, monthly, daily, by customer, by project, by action… 

It’s simplicity is its strength. Due to Kimai’s web browser based interface it runs cross-platform. Likewise you can install it as a web service or as a single-user program on your local workstation. 

“While there are many programs one can use for time and project tracking, they tend to be overkill for my rather simple needs. Kimai came about because I was tired to feed lame boring excel tables …” 

Kimai does not have to run to do the recording. You can even quit your browser. Your time is still recording until you stop it from any web browser that has access to your installment. It is designed to hold lots of users but you can use it for a single user if you need to. 

Kimai is localized in English, German, Dutch, Spanish, French, Italian and Portuguese so far. Feel free to send your self-made language files! Not all localizations are complete – we’re still looking for translators! 

You can also send us your own skin designs (find instructions in the ‘skins’ directory). We will also have some skins available in the future.

For more information : http://www.kimai.org/en/

Wednesday, March 13, 2013

BACK TRACK 5 - Enhance It

Top tips to improve Backtrack5
Backtrack is specially designed for the security researcher and hackers. Its most awesome operating system with lots of the tools but in this operating system we have to add some of the basic application to improve the performance of the operating system. We have to installsome of the basic application to use backtrack5 daily. There are 12 basic applications to install in the backtrack5. Now just open your backtrack terminal because in this operating system we have to enter the commands to install the applications.


1. Software Center

Software Center helps you to manage the applications and to search the applications to install Software Center, enter the following command in your backtrack terminal.
apt-get install software-center
This command will install Ubuntu software center using that you can search your installed application and you can also install application with just a single click.


2. Messenger

To install Messenger in the backtrack enter the bellow command in the terminal and hit enter
apt-get install empathy && apt-get install pidgin
Using this messenger you can be connected with yahoo, Facebook etc.


3. Screen Recorder

xvidcap is best screen recorder for the backtrack I have used it for 5-6 time and I personally liked it. 
To install screen recorder just enter the following command in the terminal.

apt-get install xvidcap


4.Team Viewer

You have to download it from their official website and you have to add the following command to install the team viewer.
root@bt:~# cd Downloads 
root@bt:~/Downloads# dpkg -i teamviewer_linux*.deb


5. For archive extraction

Install ark archive in the backtrack5 by adding the following command in the terminal
apt-get install ark

6. FTP client

To install FTP client into the backtrack add the following command in the terminal
apt-get install filezilla


7. PDF Reader

Install PDF reader into the backtrack 5 add the following command in the terminal.
apt-get install xpdf
And now you have done ! now you can easily use Backtrack daily base :)